Tuesday, January 31, 2012

Books II

Today I want to share a bit about two of the books I was able to borrow from the library which I found particularly interesting.

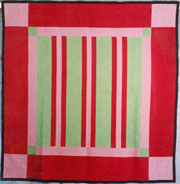
American Quilts and Coverlets in the Metropolitan Museum of Art  - This is a lovely big fat book by Amelia Peck with assistance by Cynthia Schaffner. It's a good opportunity to see quilts from the collection which are quite fragile and rarely exhibited. I love the full page photos, select close-ups and adjoining information about each piece including materials used, size, condition and history. 
A really handy catalogue section at the back features all of the quilts in the book in a unique format; two quilts per page alongside the pertinent data for each. They are arranged according to type which is an interesting alternate grouping.

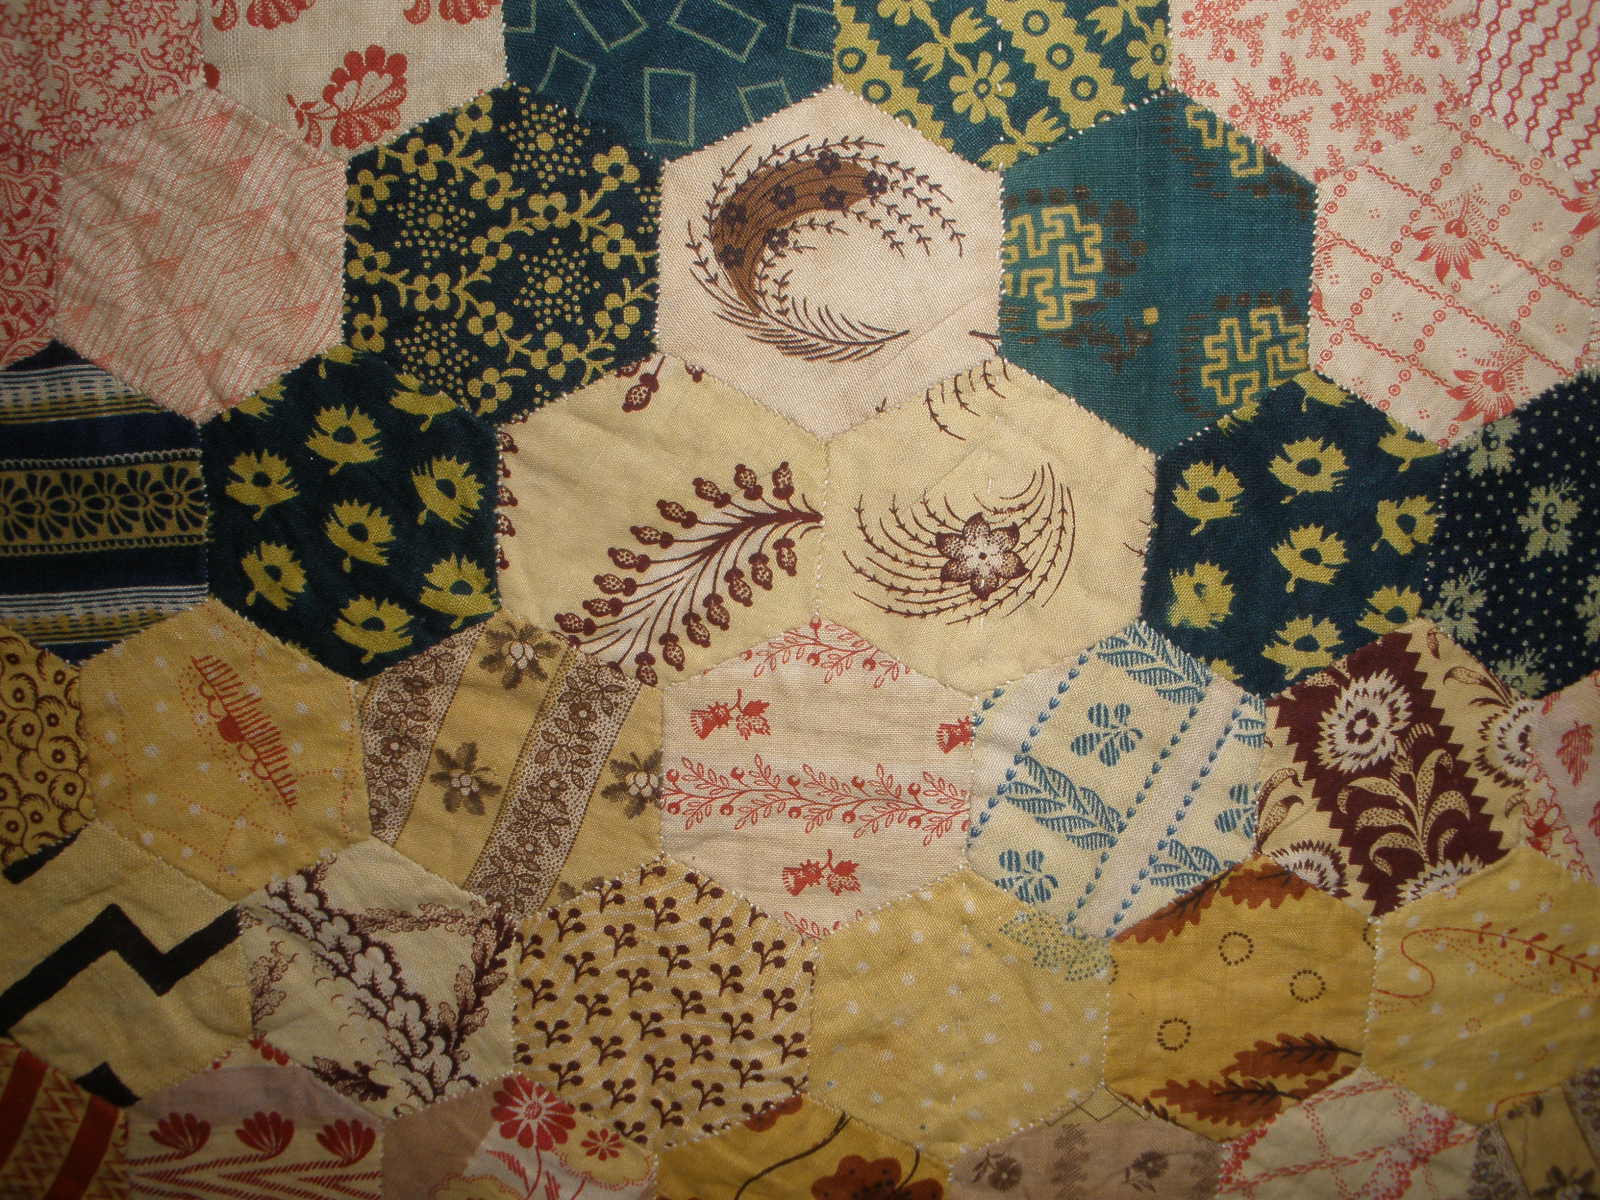
The second book is Quilting, Patchwork and Applique: A World Guide by Caroline Crabtree and Christine Shaw. It focuses on the three decorative textile techniques found in the title (patchwork, quilting and applique), dividing information into three sections; Materials, Uses and Construction. Over 500 illustrations of textiles from every imaginable country/culture including Thai, Turkish Japanese, French, Native American, Eastern European ---to name just a few --- providing a diverse and refreshing look at textiles and methods in other cultures. Browsing these pages could possibly ignite the flames of inspiration for our own creations.
The cover got my attention as I am currently hand piecing a Tumbling 
Blocks - using fabrics from a time period in American quilting that no one wants to talk about. Watch for more on that soon.


Next:
 February Experimentation Theme
 Pennsylvania 'Dutch' style


Friday, January 27, 2012

Books: Information & Inspiration

One of the things I miss most when traveling is access to my extensive library of quilt books. Currently numbering about 500, it includes how-to and pattern books, all the state documentation books, block books, books on every style from Amish to Welsh, vintage titles such as No Time on My Hands,(the inspiring story of Grace Snyder), exhibit catalogs, museum collection booklets and more.
One of the first and most inspiring to me as a new quilter was Calico and Beyond by Roberta Horton, published in 1986....


...and my most recent will be  Amish Quilts and the Welsh Connection by Dorothy Osler, which has me I anxiously checking  the mail delivery each day. Just when I think I must have enough books ... along comes another!


The good news, however, is that temporarily lacking my own personal library, I am lucky to be close to a wonderful public library!! I was posing for a photo of me with all the quilt  books I was checking out the other day - a pile in each arm - when they started to slip....

"Isn't there a limit?" said my DH
"To what?", I replied.


... and I'm grateful that I  have quilting friends nearby who share their extensive libraries with me.


I don't know about you, but I use my books. I browse constantly for information, ideas and inspiration. In fact, I was having trouble falling asleep at night and realized it might be related to my habit of browsing quilt books in bed....not a calming influence!


Support Your Public Library!

Sunday, January 22, 2012

Quilt in a Day II - Amish Bars

19" x 21"
Here's one I put together today; the 2nd in what I think will become a series. It's just too much fun! I think I could get into this size...it helps me feel better about the ones that have been in progress for years and years!

To decide what I want to do I look at examples in my books and on-line. I study their characteristics, variations and use of color. The bars design seems to always have an uneven number of strips.

I used five colors of solid cotton. The little corner squares are a slightly brighter purple. The vertical strips finish at 2".


Here are a few vintage bed size examples from the collection at the IQSC


No Corner Squares

Triangle border
Triple bars
And some variations making use of small leftovers:


Inspired to work with solids in the Amish look? 
Type "Amish" in your search to see 340 examples!

Friday, January 20, 2012

Quilt in a Day - Amish Diamond in Square

16" square
I've finished my first Amish style quilt. It's so exciting to be able to finish a quilt top in a day....Eleanor Burns doesn't lie!  It can be done....especially if it's not too big!
I've always loved this very simple, most classic example of the Amish style. I would call it 'Square in a Square' since I think of a diamond as elongated but all the Amish books refer to it as Diamond in Square or Center Diamond. Some say that the 'diamond in square' design is inspired by the triangular shape of the prayer capes Amish women wore over their shoulders.


I used cotton solids. I planned it to be about 20" square but  the red strip surrounding the center didn't seem proportional until I cut it down a bit.

The earliest Amish quilts were simple geometric designs; center square, a diamond inside a square (like mine) and rectangular vertical bars


Center Square
Bars

Here's are a few more Diamond beauties from the collection at International Quilt Study Center (IQSC) .  Most  of these are believed to have been made in the Lancaster, PA, area around 1920-1940 and all of these examples are made of  wool.
Also, keep in mind that they are bed size; ranging from 70" to 85" square. Variations are quite subtle.

This one is even simpler than mine; it doesn't use corner squares.


This one uses a few more colors.....


Here the triangles add sparkle to the diamond!


Melinda King made this one, one of the few with a known maker. Most records state 'Maker Unknown' which, sadly, is the case for most vintage quilts.


Outside of the Box:
Variations of fabrics and more detail are usually later examples without Pennsylvania provenance - and more likely made of cotton as is this example.


And here's a contemporary version of Diamond in a Square from my photo files.....a Ricky Tims creation exhibited at Houston some years ago.


Next on my list: Bars 

Tuesday, January 17, 2012

Here I Go Again.....Starting New Projects

Even though you all know I have lists filling literally pages (you've seen 'em) of 'old' projects/UFO's, or as Lynn calls them 'Works in Progress"...it IS a New Year and it's energizing to be starting a New Project.....or two.... okay, I happen to have three small quilts in mind.
I've chosen a theme for each month this year - a way to remind myself to  experiment and add freshness to my on-going projects.


January is Amish style.Here is an assortment of fabrics I plan to use for my first design; the classic Diamond in a Square.


February is Pennsylvania German style. I pulled some pieces from my stash that should work.


In March I'm going back to the '70's.  The 1970's!! 
Where did I get all of these? 


I've had to think ahead - pre-planning these three months because I will be traveling and won't have access to my fabric stash.

 I start sewing tomorrow.....
Stay Tuned!

Friday, January 13, 2012

Mosaic Patchwork - Not the Paper Piecing of Today

I recently had the good fortune to see Elegant Geometry;  American and British Mosaic Patchwork Quilts at the IQSG (International Quilt Study Center) in Lincoln, Nebraska - just before the end of its run.
No flash photography is allowed so the few photos I am posting appear 'yellowed' compared to the real quilts.


I was especially drawn to this border.  Familiar? On my last post you saw the pieced 'tall triangles' border I am doing on one of my projects. Upon close inspection I discovered that these triangles are appliqued with a whip-stitch onto a plain background!  Hmm. Would that have been easier?
I'm sorry I don't have a close-up that captures this detail but click here to see the full quilt dated 1818. It's a stunner. (Sixth quilt)


These are the tiniest hexagons I've ever seen - measuring less than 1/4" on a side.
I asked an innocent bystander to help me show the scale!


Take a look at the amazing variety of cotton prints in these close-ups...all from one quilt.
 I'd like a fat quarter of each, please!


The good news is....YOU can see all of the quilts in the exhibit! All but one are part of their permanent collection. Click here. From this page you can order the catalog, have access to the gallery notes and accompanying lecture.

If you are not familiar with the concept of English Paper Piecing it involves basting fabric to paper shapes and whip-stitching the edges together. For more specific details on the method click here.


Hexagons are not the only shape pieced using this English method but perhaps they are the shape we most often associate with it today. Triangles, squares and other shapes were also pieced this way.
The informative exhibit catalog reminds us of this  fact and I quote from the concluding paragraph, "the technique has been traced back through three centuries to eighteenth-century domestic needlework.....and has had a seminal influence on the development of the patchwork tradition" in both the United States and the UK. The catalog is well done with excellent photos including close-ups. It is available through the gift shop here.


The study center has continual exhibits. Free audio devices allow you to devote full attention to viewing each quilt while listening to information about it.

To learn more about the study center and all it has to offer, visit their website(IQSG). If you are anywhere in the vicinity it is definitely worth a stop!


By the way, next fall the AQSG seminar will be held in Lincoln !
October 4-8 

Tuesday, January 3, 2012

Mariner's Compass - A Ghost of Quilt Years Past


I wish you are a very happy, healthy and productive new year!! Thank you for your interest in my blog and for your comments and ideas this past year. I do appreciate you all so much and look forward to sharing our passion for a variety of quilting topics in 2012.


I talked about goals in my last post so I better get moving!  The party's over - the cookies are gone...it's time to get  back to work.


And speaking of work - here's a 'work-in-progress' from 2011.  Does it look familiar?

At the very end of December I pushed myself to get back to this before the stroke of midnight.


I finalized the plan for my the outer border. It will be 'tall' triangles. I like this shape because it echoes the sharp points seen in the central compass. The measurements of this final border will determine the size needed for the 'coping' border between it and the checkerboard.


To make my template I tried different angles on graph paper and when I liked the proportion ( a 4" base) I glued it to a heavier cardboard, let it dry overnight, and then cut it out. I used a awl to poke a hole at the intersections of the seams. I later found that I was able to eyeball the placement without marking it.


I glued a small piece of fine sandpaper to the back when I found it was slipping a bit as I traced. (A few small squares would have worked just as well!)
I keep saying I learn something with every project - and it's true.


I wanted to use a wide variety of the beautiful prints from the Regency Collection by Anita Shakelford  and Marcus Bros.  This meant I had to trace the prints individually and cut them out with scissors.


But I was able to be more efficient with the alternate tan triangle by cutting a 6.5" strip ......


......and drawing a pencil line on each side of the template.
Then I used an acrylic ruler (with good light at just the right angle) and rotary cut on the pencil lines.


It's going well and now I regret dragging my feet so much...but this year I will finish the top, sandwich it with the wool batting I've been saving and get started on the hand quilting.


You have my word on it!


To read earlier posts on this project click:
 Part 1   Part 2    Part 3