(Do not hesitate to 'remind' me about things like that!)
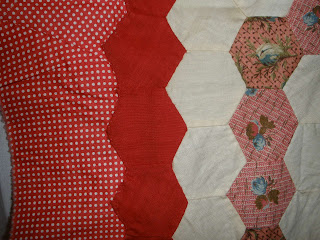
Browsing an antique shop in Arizona, this striking poppy applique caught my eye. I got a very good price on it, probably because it had one small hole needing repair - but even with that it was a steal. I love the gentle wavy edges.
-001.JPG) |
| Rosie Werner, of Quiltkitid.com has thirty-two different poppy kit quilt applique designs on her website - not including this one! |
 |
| What company produced it? What publication was it in? |
A friend found this image in her files and it is exactly like mine. Sold as a kit, the white fabric would have been marked to indicate where the appliques should be placed and the kit would include stamped fabrics in dark red, light red and green to cut out and place as directed. Fabric pieces were numbered to correspond to the numbers stamped on the white ground fabric.The design for quilting stitches would also be marked. The maker would provide the backing and the cotton batting
Reading the details and directions on old patterns gives us information about how things were done in the past. In this case, "No 50" thread was to be used for the quilting....the weight of regular sewing thread.
These are examples from a different, unfinished, kit top. The poor construction on this one means it will never be finished; not by me, anyway.
Advertising of the day assured women that it was simple to make a quilt with all the pieces prepared for you ....sort of like 'paint by number'. By the way, kits drew criticism from some that creativity had gone out of quiltmaking.)
Many women who didn't even know how to sew were persuaded to give it a try but all were not successful! Many projects were surely abandoned in frustration, like this one!
Many women who didn't even know how to sew were persuaded to give it a try but all were not successful! Many projects were surely abandoned in frustration, like this one!
My quilt is not soiled but I want to wash it - it smells and feels like someone got carried away with liquid fabric softener. But first - I need to fix that rip.
.JPG) |
| The damage - does not go through to the back |
 |
| Searching my stash for the 'right' white |
 |
| I clean up frayed edges ... add a little cotton batting |
 |
| Cut an oval - match grainlines and applique |
I was going to do reverse applique but the damage goes right up next to the vine so a traditional 'patch' worked best.
The quilting is rather sparse so it was not as easy to camouflage the patch with quilting....but I added a swirl line from the nearby vine to blend it in
Can you find it?
It washed beautifully and is ready for use. I have done very little quilt repair so I consider each project a way to learn and improve my skills. I can't say it's my favorite thing to do, but I know I'm giving the quilt an extended life. You know what they say, "A stitch in time...." Quilt Restoration: A Practical Guide by Camille Cognac is a great book with down-to-earth methods of quilt repair. Though out of print, there are some copies available on-line from time to time and both our county and local textile library have copies. If you have quilts to 'fix' it's worth looking up.
-001.JPG)
.JPG)


.JPG)


.JPG)
.JPG)
.JPG)