Showing posts with label sashing. Show all posts

Sunday, October 6, 2019

'The Hand' Finally Done (Bear Paw Variation)


78 x 90

Today I have some exciting news! I've finished a UFO that's been nineteen years in the making.  (Not a typo and sadly not the oldest UFO on my list!)

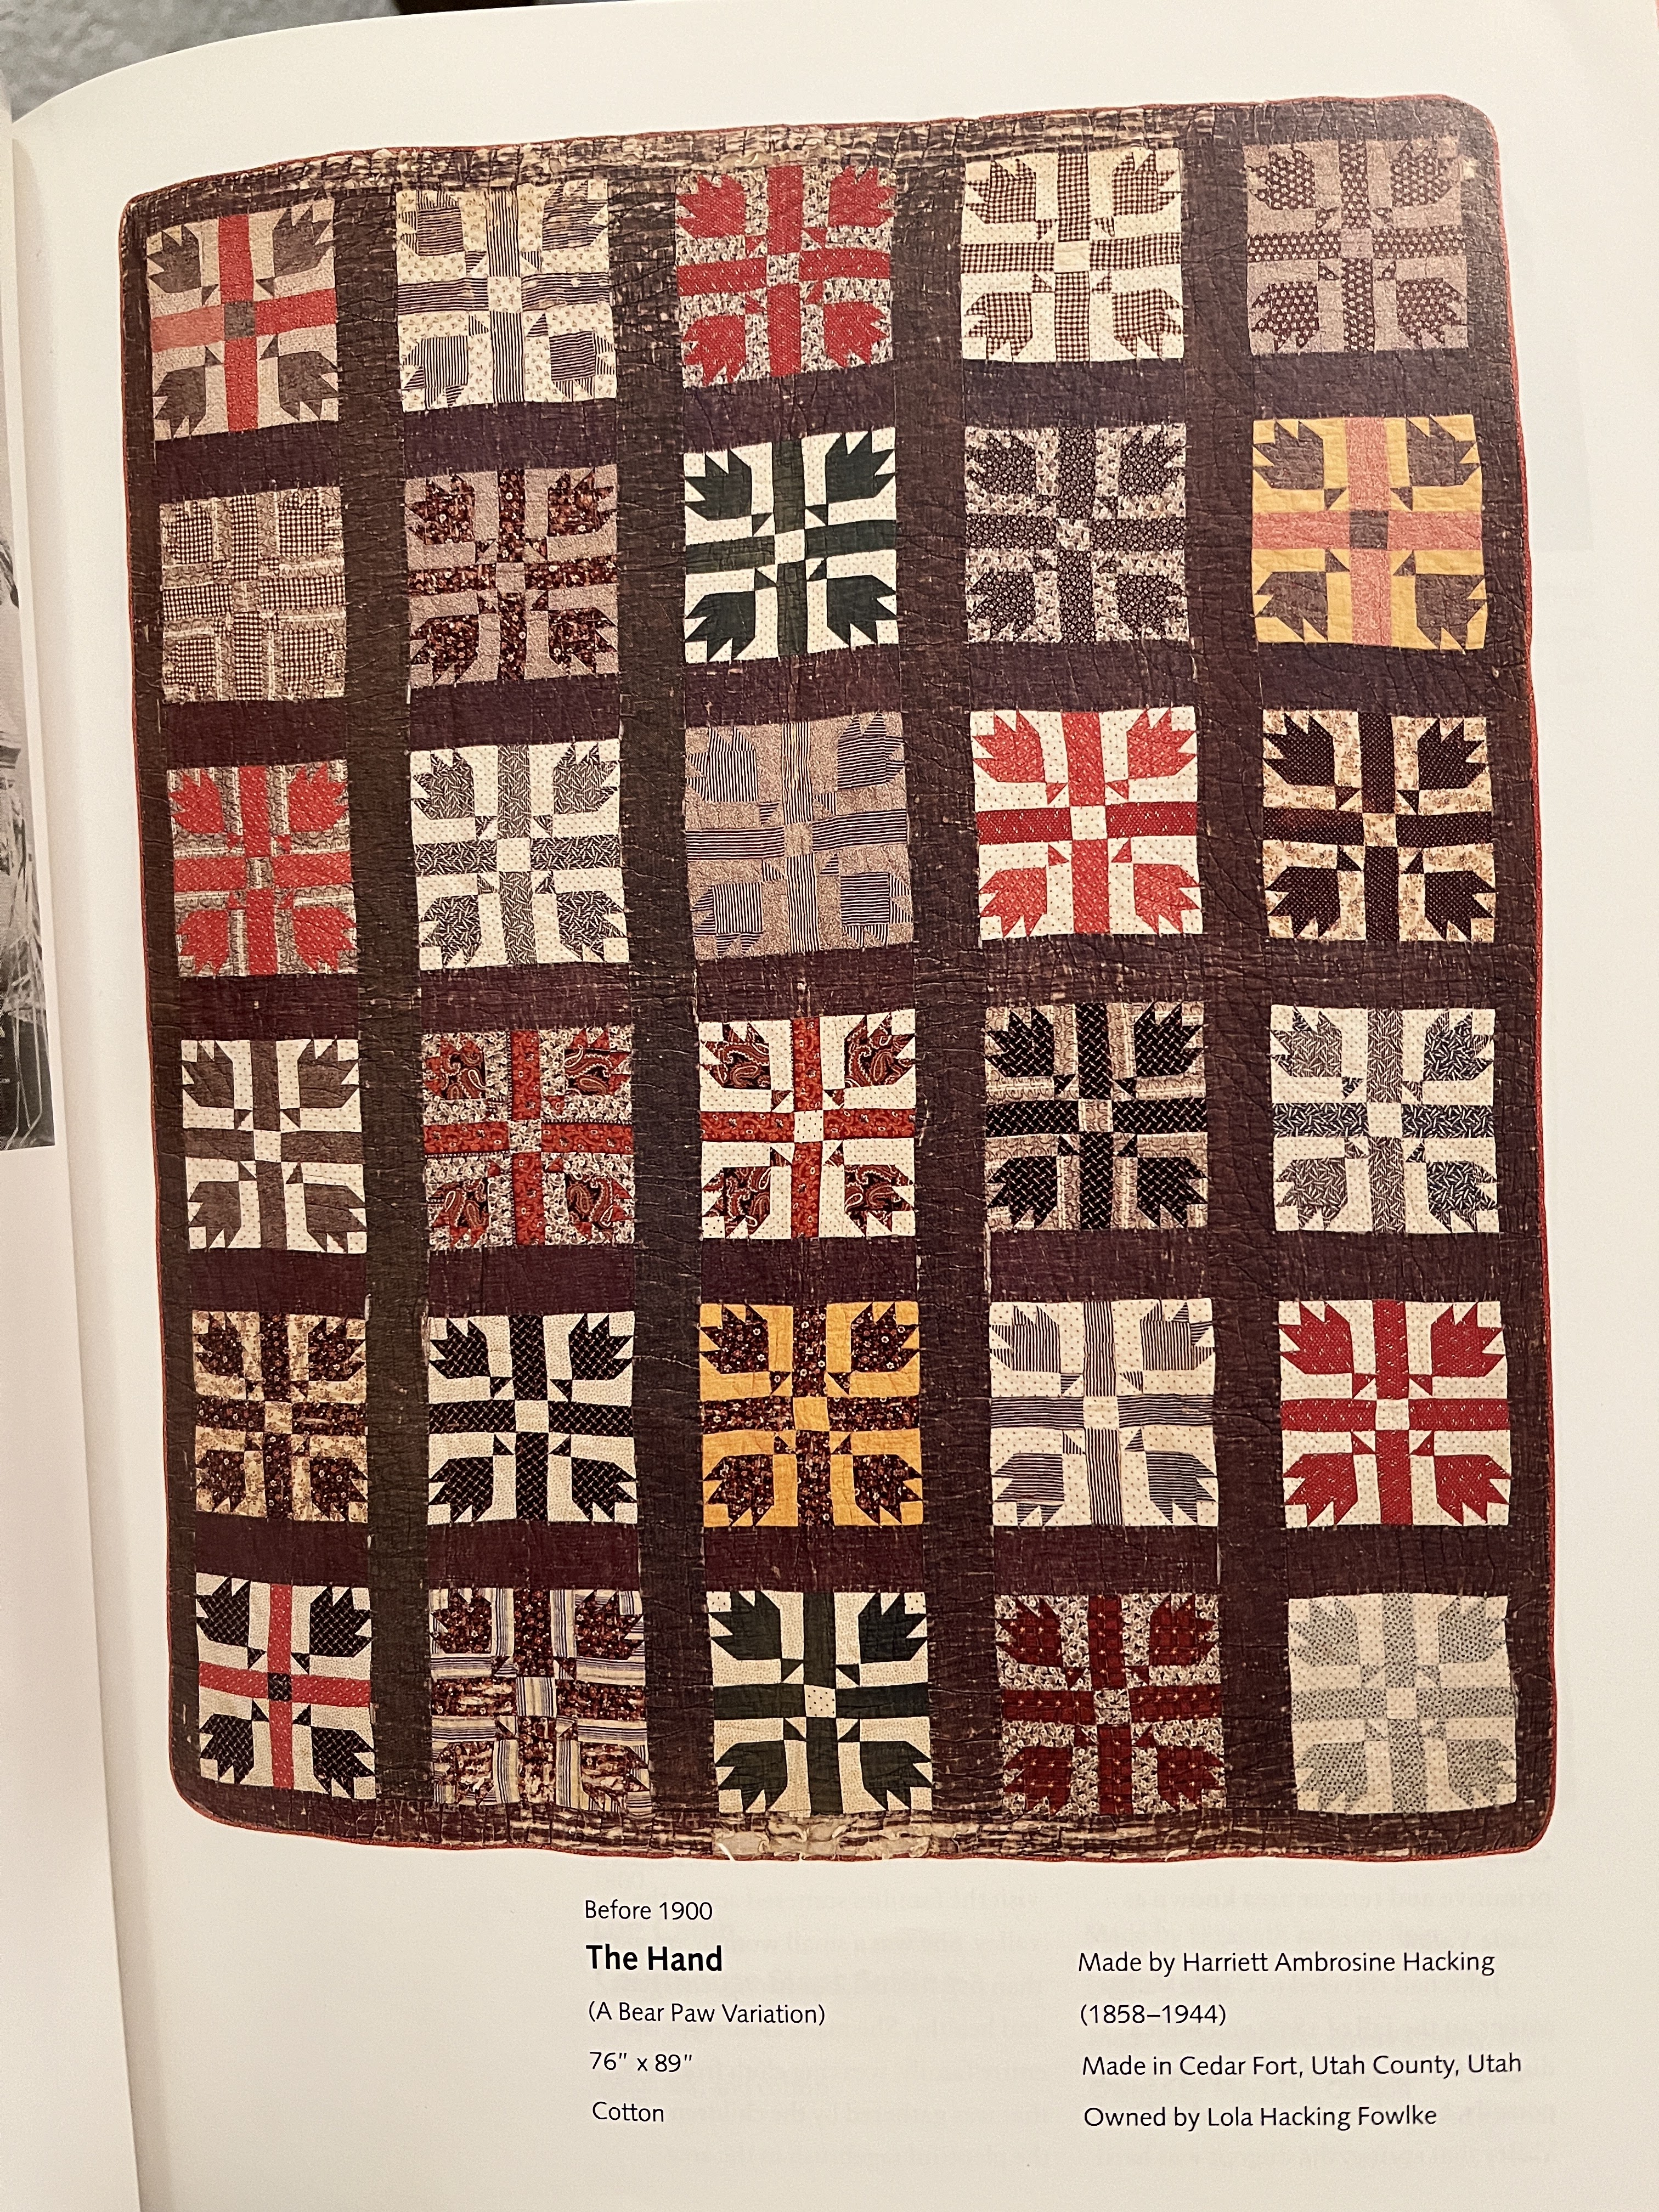
Back in 2000 I was taken with a vintage quilt in the Utah state documentation book. (p. 49)  The book called it 'The Hand'  and dated it pre-1900.

I've written a couple of blogs about this project over the years. To see the first blog written in 2012 click here.  In it you can see the vintage quilt that inspired me. I drafted the block from the photo and began making blocks borrowing color combinations (but not placement) from the original.

I made a few blocks now and then, it was not high on my list, but finally I decided to get the blocks done over a winter in Arizona. The sashing fabric I chose didn't work out. This updated blog in 2014, first top shows the completed top with blue sashing having black stars. I tried to like it, I really did, but I fnally realized I would have to take it apart. I ripped out the sashing and chose a brown print. It was a great relief. (If you like the blue better than the brown that's okay. I didn't, so it had to go.)

These photos show the brown print better and closer to the actual color than the full view above.
The top sat for another little while as I did other things and began to think about how I wanted to quilt it. That took time as you hand quilters will appreciate and tackling the basting needs a certain mindset.

           THE TOP                                               


                   PIN-BASTING (ala Harriet Hargrave) 


I finally decided to do alternating diagonal lines in the pieced blocks about 1" apart and a diagonal grid in the sashing, a bit smaller than 1", a classic simple approach. The border was done in a 1.75" diagonal grid.


sorry about this....not focus, bad color... but shows the quilting.


Strippy Backing

So that's why it took a number of years to finish. I hesitate to make the label....it seems to need a lot of explaining beyond "Made 2000-2019"


I wanted to  mention, too, something about size. Plan your top  4-5" larger than what you want the finished size to be; most important if you are planning it for a certain size bed.

The finished top measured 82 x 95
After quilting it measured 80 x 93
After washing it measures 78 x 90 

I always wash completed bed quilts. I like the look after washing, I like knowing it's clean, markings are gone and I like to know the finished size.  I pre-wash all fabrics when I bring them home but I tossed in a few color catchers just to be sure -  and look what they revealed!

No colors bled into surrounding lighter fabrics but the reds and browns often have excess dye even when they've been pre-washed.

BTW, I just checked the original vintage quilt in the book. It measured 76 x 89 - very close to my finished size though it started much larger.


2023 update: Here is the original inspiration from the Utah quilt book Gathered in Time . the link above does not seem to work. 


Thanks for stopping by. . .
I welcome your comments


Sunday, November 29, 2015

Christmas Stars - Considerations and Decisions


60" square
There is nothing like a public commitment, along with a challenge, to get me to buckle down and focus.
The Christmas Lone Star blocks I made in 2002 (as described in the previous post) have been rescued from the UFO tub and come together in a very festive Christmas quilt... (technically still a top which at this late date will be the case until Christmas 2016)
Still, I am so pleased to have made progress on this! It was a major goal of mine this year to deal with my UFO's.
After determining the math and cutting the squares and triangles to finish each block, I got quite adept at the somewhat tricky process. As I worked at my machine I thought about how I might arrange them. I spent evenings browsing books from my collection for ideas and looking on-line using Google Image and Instagram with 'lone star quilts' as key words.
Texas being the 'Lone Star State' I started with these books:

Then these:

and this one, To Honor and Comfort, which inspired my Southwest Star

After studying these books and internet photos I knew what I wanted to do.

What is your destiny?
I decided to use nine of the ten blocks set 3 by 3 resulting in a square quilt. Besides the challenge of setting ten blocks, I felt that this one was much bolder than the others and that it would distract from the balance of the piece. I'll make something else with it.... pillow? table topper? wall or doll quilt?
Truer colors of the red and green


Every project involves multiple decisions. My considerations in this case were these:
  • What size and shape did I want the finished piece? 
  • How did I want to use it? 
  • How much time did I want to invest in it?
    • complexity of setting
    • how it would be quilted 
Ultimately, I decided to set the blocks straight, three by three, within a narrow (1.5") sashing for these reasons.

  •  Setting them side by side results in big open squares that insists on some pretty special quilting in my opinion. You can't see how that space is quilted in this example but you do see the big open areas of background.
  •  My blocks are all different and I like the idea of each one getting some attention.
  •  The finished size would be about 60" square - fitting for my goals.
  •  Available fabric -I found some of the same red in the stars in my Christmas bin for the sashing. I used tidbits, also in that bin, of a large scale print that also appears in most blocks, for the cornerstones.
I used EQ to play with numbers and layouts; with and without cornerstones in different colors; tan, green, mottled. I liked the break those little squares provided. That helped me decide to cut the sashing 2" wide and let it serve as the outer border.
I used my design wall to arrange the blocks.The process of making all of these artistic decisions can be frustrating but it's energizing in the end. This is my work. Yes, it takes a sometimes more agonizing path than following a pattern but the satisfaction you get as you take each step is worth it.
There are so many ways to do things; no one way is right. Keep moving along. Try things, decide, move on. Sometimes you don't know why you like one thing or another but you don't need to. Stand back, squint, move things, try this and that ...and you will know what you like. Be okay with ripping if what you thought would work doesn't. Get it the way you want it.

Each 2" square can be different
For example, I cut the 2" squares for the cornerstones from a large print and just sewed them in.  I wanted a random look...not match-y. But I realized when they were sewn in that one was almost all dark green and it stood out. I had to decide to leave it or remove it ...maybe I should use a different dark green for all of them; think think think.But I wanted them to be less obtrusive. I removed two of them and this time was more careful to selectively cut lighter squares that would blend.

I decided to put squares at each outer corner, too, and for those I thought before I cut! I wanted the dark green dominant with a cluster of red included so my fabric looks like Swiss cheese now.I like the result.

So now on to a few other things.....

What is on your 'to-do' list for the holidays?